The below steps are only available for shades invoiced prior to March 2021.
Shades invoices after March 2021, contact your place of purchase.
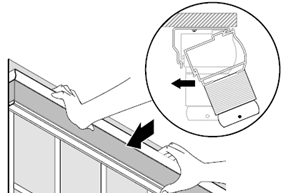
- A wide bladed device, such as a flat head screwdriver, can be put between the headrail and the bracket to help pop it out of the brackets.
NOTE: On larger shades you may need an additional person to help with this step for quick and safe removal.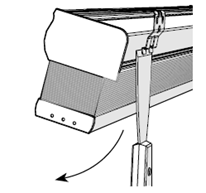
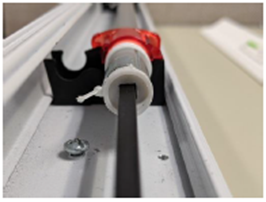
- Once the shade is down, remove the plastic dust cover. You can also use a screwdriver to help remove the dust cover.
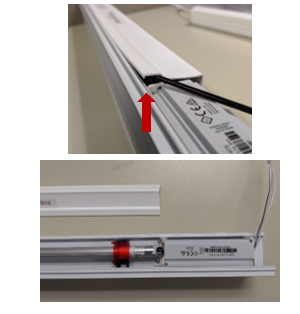
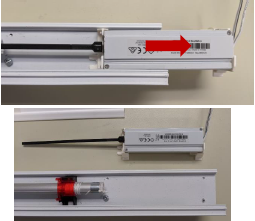
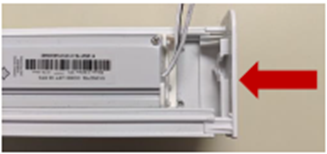
- Pull off the endcap from the right side of the headrail.
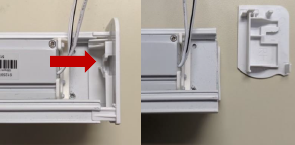
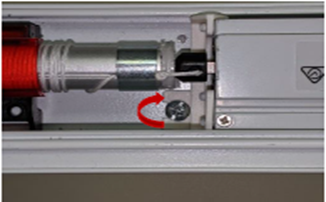
- With a small Philips head screwdriver, loosen the screw holding the motor in place.
- With the shade laying flat, remove the motor from the shade by sliding it to the right. The motor and driveshaft (the black metal rod) will come out together.
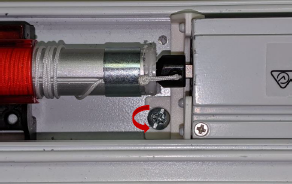
- Insert the new motor into the headrail while making sure the motors brackets slide smoothly into their channel.

- With the motor fully inserted, tighten the screw to hold the motor in place.
- Snap the dustcover back on the headrail.
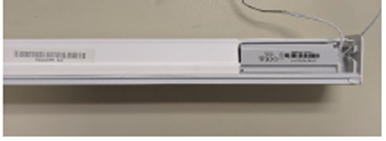
- Slide the right-hand endcap back on.
- Reinstall the shade into its mounting brackets.
Follow the link here to program the new motor to your controller and set upper and lower limits. (link here)
For additional support:
Email: motorization.support@springswindowfashions.com, responses could take up to 24 hours
Customer Service Team: 1-800-221-6352
Was this article helpful?
That’s Great!
Thank you for your feedback
Sorry! We couldn't be helpful
Thank you for your feedback
Feedback sent
We appreciate your effort and will try to fix the article